
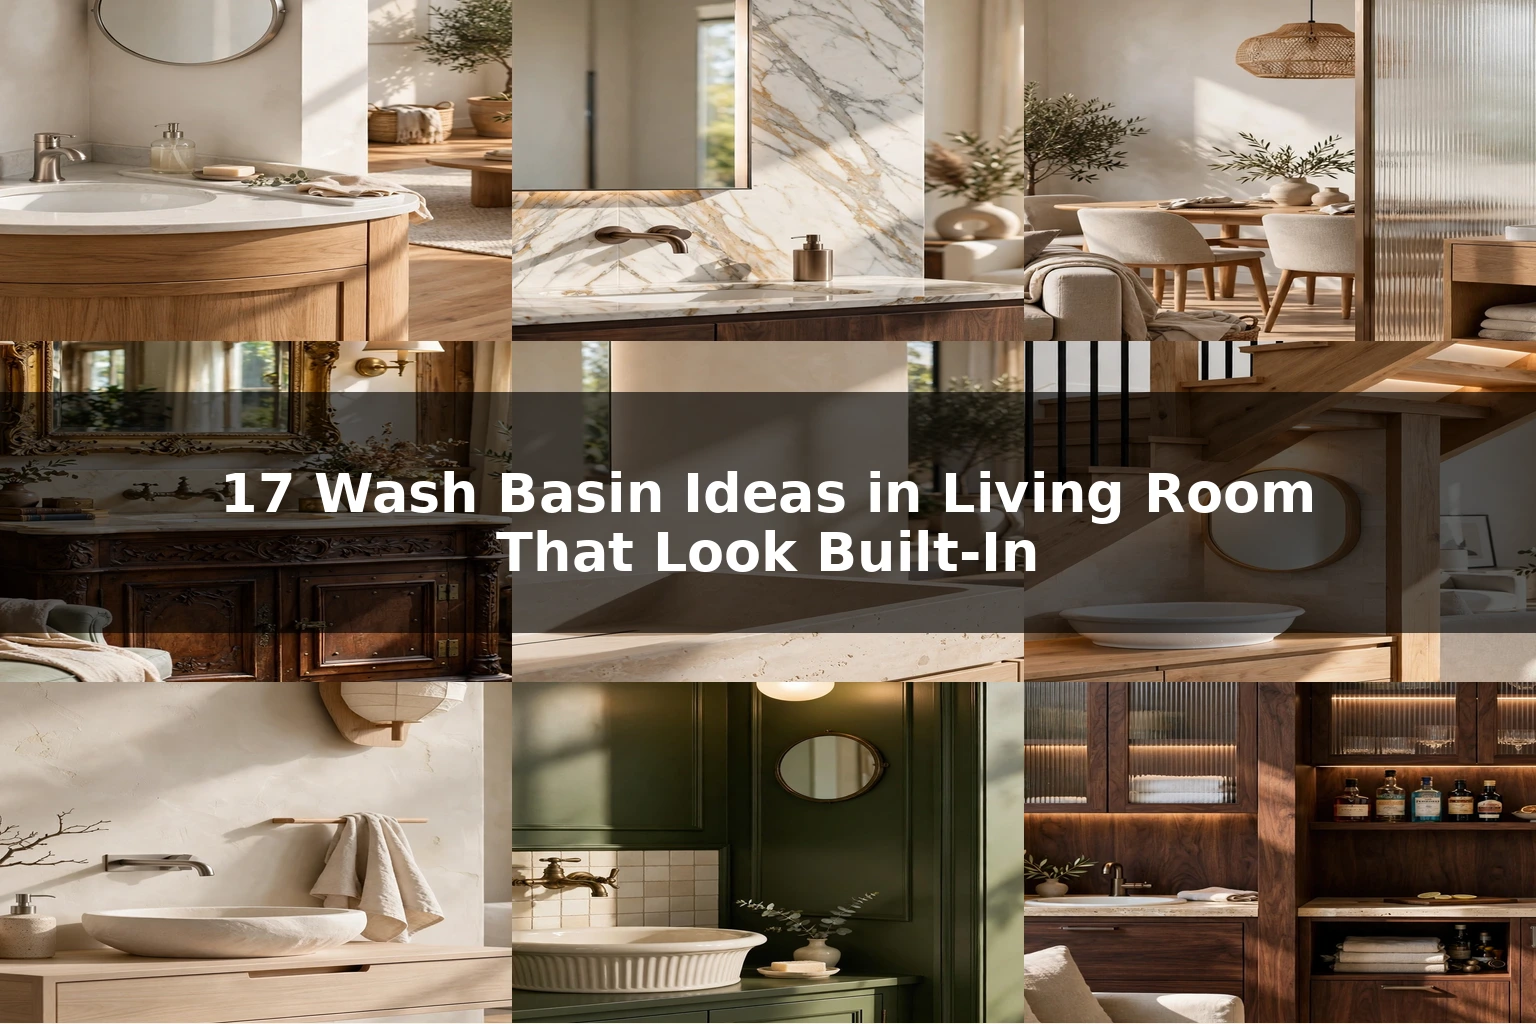
17 Wash Basin Ideas in Living Room That Look Built-In
A wash basin in a living room presents an unusual design challenge. It needs to be convenient enough for everyday handwashing but refined enough to sit beside upholstered furniture, artwork and carefully chosen lighting. If the pipes remain visible, the counter collects bottles or water marks spread across the wall, the basin quickly feels like a bathroom fixture placed in the wrong room.
These 17 Wash Basin Ideas in Living Room That Look Built-In take a more considered approach. Instead of treating the basin as a standalone object, each design connects it to the room through cabinetry, materials, lighting and architecture. The result feels like furniture when viewed from the sofa and functions like a well-planned wash area when someone steps closer.
Before choosing a basin, ask a plumber whether the proposed wall is close to an existing bathroom, kitchen or utility line. Shorter water and waste connections generally simplify installation, but drainage, venting, waterproofing and local building requirements still need professional assessment.
Before You Choose a Living-Room Wash Basin
Start with placement, not appearance
The least disruptive position is often near a wall shared with a kitchen, bathroom or utility space. This can shorten the plumbing route and may reduce the amount of flooring and wall material that must be disturbed.
Convenience should not come at the expense of circulation. Avoid placing the vanity where a dining chair, entrance door or cabinet drawer prevents someone from standing comfortably at the basin.
Design around water
Protect the wall with tile, porcelain, quartz, sealed stone, glass or another appropriate water-resistant surface. A small upstand may be sufficient for a deep undermount basin, while a shallow vessel basin with a tall faucet usually needs a more generous backsplash.
Ordinary MDF, unsealed wood and highly porous stone can deteriorate or stain when repeatedly exposed to water. Discuss moisture-resistant substrates, sealants and edge protection with the fabricator.
Check the complete basin height
The comfortable height depends on the users and the basin style. A vessel basin sits above the counter, so its vanity often needs to be lower than a counter holding an undermount basin.
Measure to the finished rim—not simply to the countertop. A tall bowl installed on a standard-height cabinet may look elegant but feel uncomfortable for children or shorter adults.
Plan for unattractive necessities
A successful wash area needs discreet places for:
- Soap and refills
- Clean hand towels
- Used towels
- Cleaning products
- Tissues
- A small waste bin
- Plumbing valves and the waste trap
Designer Tip: Mark the proposed cabinet on the wall and floor with painter’s tape. Walk around it, open nearby doors and pull out dining chairs before approving the dimensions.
1. Float a Vanity That Resembles a Console

A floating vanity is one of the easiest ways to make a basin belong in the living room. Its clean, horizontal shape resembles a console table, while the visible flooring underneath makes the installation feel lighter than a full-height bathroom cabinet.
This design is especially effective in contemporary apartments, small living rooms and open-plan homes. Choose furniture-quality veneer, discreet handles or handleless drawers, and a countertop already represented elsewhere in the room.
A deep undermount basin creates the quietest appearance, while a low vessel basin adds a more decorative focal point. Drawers can hold towels and soap, but their internal shape must be planned around the pipework.
Common Mistake: Ordering standard drawers before confirming where the waste pipe will pass through the cabinet.
Budget Hack: Use a moisture-resistant wall-hung cabinet and add a locally fabricated quartz top.
Luxury Upgrade: Specify book-matched timber veneer, curved cabinet ends and integrated drawer lighting.
2. Recess the Basin Inside an Entrance Niche

An entrance niche gives a living-room basin a natural purpose: family members and guests can wash their hands as they arrive without walking through private parts of the home.
Frame the entire niche with tile, stone, washable paint or color so it reads as one architectural composition. A compact vanity, mirror and sconce should fit comfortably inside the opening without projecting into the entrance route.
This approach works best when the niche is close to plumbing and deep enough to accommodate a practical basin. If the recess is shallow, choose a semi-recessed bowl that projects slightly beyond the cabinet while keeping the storage unit compact.
Styling Secret: Repeat the vanity wood or metal faucet finish on the entrance console, coat hooks or living-room lighting.
Common Mistake: Filling a small niche with decorative bottles, plants and baskets. Keep the styling restrained so guests have space to wash comfortably.
Budget Hack: Use washable paint on most of the niche and install tile only within the immediate splash zone.
3. Make a Stone Vessel Basin the Focal Point

A carved stone vessel basin gives the wash area the visual weight of a sculpture. Travertine, granite, marble and sandstone introduce natural texture that feels appropriate beside living-room furniture.
This idea works particularly well in organic-modern, contemporary and luxury interiors. Let the basin be the dominant feature by pairing it with a simple counter and a quiet wall finish. Using heavily patterned stone on the basin, vanity top and backsplash can make a small area feel unnecessarily heavy.
Stone performance varies. Some natural materials require regular sealing and can react to acidic cleaning products. Ask the supplier whether the selected stone is suitable for a frequently used wash basin.
Designer Tip: Pair a shallow stone bowl with a low, carefully positioned faucet. A tall waterfall spout may create more splashing than the photograph suggests.
Budget Hack: Choose a stone-effect ceramic basin and place it on a genuine stone offcut.
Luxury Upgrade: Commission a basin carved from the same stone used on a nearby coffee or dining table.
4. Position the Basin Beside the Dining Area

A basin beside the dining space has an obvious function. Guests can wash before eating, while the household avoids directing everyone toward a private bathroom.
Position the vanity along the edge of the dining zone instead of directly behind a chair. Someone using the basin should not force a seated guest to move. Maintain a clear standing area and ensure drawers can open without striking dining furniture.
Connect the wash area to the dining room by matching it with the sideboard. For example, repeat walnut cabinetry, slim brass handles or the dining-table stone on the basin counter.
Designer Tip: Use warm, flattering light. A harsh white spotlight will make the area feel more like a commercial washroom than part of an inviting dining space.
Budget Hack: Paint an affordable vanity in the same color as the dining cabinet and repeat its handles.
Luxury Upgrade: Build the basin and sideboard as one continuous wall of custom millwork.
5. Introduce Texture with a Fluted-Wood Vanity

Vertical fluting brings rhythm and shadow to the vanity, disguises cabinet joints and gives a functional unit the character of custom furniture. It complements warm-modern, transitional, Japandi and mid-century-inspired rooms.
Use a moisture-resistant cabinet core with properly finished veneer or durable fluted panels. A stone or solid-surface countertop should extend slightly beyond the timber face to prevent drips from running directly over the cabinet.
Because fluting already creates visual movement, pair it with a simple basin. A white oval vessel bowl, rectangular undermount basin or integrated sink keeps the composition balanced.
Common Mistake: Installing decorative MDF fluting directly beneath an overhanging vessel basin without protecting it from water.
Budget Hack: Apply ready-made fluted moisture-resistant panels to a plain vanity front.
Luxury Upgrade: Wrap continuous fluting around gently curved cabinet ends.
6. Save Space with a Wall-Mounted Basin

When a conventional vanity would block a passage, a compact wall-mounted basin can provide handwashing without consuming valuable floor area. It is suitable for apartment entrances, narrow living–dining rooms and small transitional spaces.
A bare ceramic basin can appear institutional, so surround it with residential details. Add a decorative mirror, attractive faucet, slim stone shelf and warm sconce. If the trap remains visible, specify an intentional metal finish rather than using mismatched plastic pipework.
The basin still needs somewhere to hold soap. A shallow ledge or recessed shelf is enough, provided it does not interfere with handwashing.
Styling Secret: Match the exposed bottle trap to the faucet so the pipework appears deliberate.
Budget Hack: Select a standard white basin and invest in one distinctive mirror.
Luxury Upgrade: Choose a sculptural wall-hung basin fabricated from solid surface or stone.
7. Frame the Basin with an Arched Alcove

An arched alcove visually separates the wash station without using a door. The curved opening softens the basin’s hard surfaces and transforms a practical feature into a memorable architectural moment.
This design is particularly suitable for Mediterranean, modern-classic and softly minimalist interiors. Continue tile, limewash or microcement around the curved reveal, then align the basin and mirror carefully inside it.
An arch needs sufficient height and width. Forcing it into a cramped recess can make it feel ornamental rather than integrated. Leave enough elbow room for comfortable handwashing.
Styling Secret: Repeat the arch only once nearby—perhaps through a curved chair, doorway or lamp—to establish a subtle connection.
Budget Hack: Create the visual suggestion of an arch with a painted color block instead of altering the wall.
Luxury Upgrade: Add concealed lighting around the inner edge of the alcove.
8. Turn an Awkward Corner into a Wash Station

An empty corner that cannot accommodate full-depth furniture may be large enough for a compact basin. A triangular cabinet, rounded vanity or curved stone shelf can make the corner useful without obstructing movement.
This solution works well in irregular apartments, stair landings and small open-plan homes. Use rounded counter edges in tight circulation zones so no one walks into a sharp corner.
Mirror placement requires care. A small circular mirror on one wall often looks cleaner than attempting to force a large rectangular mirror across the junction.
Common Mistake: Choosing an extremely tiny bowl. It may fit the corner but cause water to splash onto both adjoining walls.
Budget Hack: Install a simple triangular stone shelf with a removable painted panel concealing the pipes.
Luxury Upgrade: Fabricate a curved vanity that appears to flow seamlessly from one wall to the other.
9. Create Drama with a Full-Height Stone Backsplash

Extending stone or large-format porcelain from the vanity to the ceiling creates a strong architectural backdrop. It also protects the wall and visually contains the basin within a clearly defined zone.
This approach suits contemporary, minimalist and luxury interiors. A single uninterrupted material can calm an open-plan room, especially when the surrounding furniture and artwork already provide visual variety.
Natural marble is beautiful but needs appropriate sealing and maintenance. Large-format porcelain can provide a similar effect with predictable performance and fewer concerns about staining.
Designer Tip: Approve the slab layout before cutting. Align the mirror and basin with the most attractive part of the veining.
Budget Hack: Use one large porcelain tile or a book-matched laminate panel designed for wet applications.
Luxury Upgrade: Fabricate a narrow floating shelf from the same slab.
10. Screen the Basin with a Decorative Partition

A partial partition can conceal the most utilitarian view of the basin while preserving light and openness. Timber slats, fluted glass, perforated metal and half-height walls are all effective options.
Fluted or reeded glass is especially useful because it blurs soap bottles and hand movements without darkening the space. Clear glass creates physical separation but provides little visual privacy.
Place the screen where it hides the bowl from the main sofa or dining table. It does not need to enclose the entire wash area. Leave adequate standing room and ensure the partition will not be damaged by routine splashing.
Common Mistake: Building the screen so close to the vanity that cabinet doors cannot open fully.
Budget Hack: Use a freestanding timber-slat screen anchored safely to the floor and wall.
Luxury Upgrade: Commission a slim bronze-framed panel with fluted glass and concealed fixings.
11. Convert an Antique Cabinet into a Vanity

A vintage chest, carved console or antique sideboard can make a wash basin feel like a collected piece of furniture. It is ideal for traditional, eclectic and character-rich living rooms where a conventional bathroom vanity would feel too clinical.
The cabinet must be structurally sound and properly protected from moisture. Its top may need reinforcement, while the back and drawers require careful modification around the pipes.
A vessel basin reduces the size of the cutout but adds height. An undermount basin preserves a lower working rim but requires a larger opening through the cabinet top.
Designer Tip: Calculate the finished rim height before choosing between an undermount and vessel basin.
Common Mistake: Permanently closing the cabinet around the trap. Include a removable panel for maintenance.
Luxury Upgrade: Add a honed marble top while preserving the original timber and hardware.
12. Choose a Seamless Integrated Basin

An integrated basin is fabricated from the same material as the counter, eliminating the visible line between sink and worktop. Its uninterrupted form looks closer to bespoke furniture than conventional sanitaryware.
Solid surface, quartz and carefully fabricated stone can achieve this appearance. The basin requires enough slope to drain properly; extremely flat designer sinks may retain water and display mineral marks.
Ask the fabricator how the internal corners will be joined, where the drain will sit and how the plumbing can be accessed. Minimalist design places greater attention on small fabrication flaws.
Common Mistake: Selecting a nearly flat basin based on appearance without testing its drainage.
Budget Hack: Purchase a ready-made integrated solid-surface top in a standard size.
Luxury Upgrade: Continue the basin material vertically onto the wall and floating side shelf.
13. Build a Wash Station Under the Staircase

The space under a staircase often sits beside an important circulation route but cannot accommodate tall furniture. A low vanity can turn this underused area into a practical wash station.
Position the basin beneath the highest part of the stairs so users have comfortable headroom. Fit storage into the lower section, but keep the plumbing accessible through removable drawers or panels.
Under-stair areas can feel dark, so combine a mirror with warm task lighting. Continuing the staircase timber or stone onto the vanity will make both elements read as one composition.
Common Mistake: Centering the basin within the wall without considering the descending staircase above it.
Budget Hack: Use a freestanding vanity beneath the highest point and paint the remaining wall in one unifying color.
Luxury Upgrade: Commission drawers that follow the staircase angle exactly.
14. Create a Calm Japandi Basin Area

Japandi design combines clean Japanese simplicity with the warmth of Scandinavian materials. A pale timber vanity, softly rounded basin and tactile neutral wall can reduce the basin’s association with a conventional bathroom.
This style works best when visual clutter is tightly controlled. Store spare towels and bottles inside the vanity, leaving only one soap dispenser and perhaps a small branch or handmade ceramic object on display.
Minimalism does not mean ignoring practicality. Choose durable materials, protect the timber edges and give the basin enough depth to contain water.
Styling Secret: Introduce gentle asymmetry with an off-center sconce or decorative branch while keeping the basin and faucet functionally aligned.
Budget Hack: Combine an affordable white basin with a simple oak-look cabinet and limewash-effect paint.
Luxury Upgrade: Use hand-finished timber, a carved stone bowl and artisan metalwork.
15. Color-Drench a Small Wash Basin Nook
Color-drenching means carrying one color across the walls, trim and cabinetry. In a basin nook, this makes several functional elements read as one intentional block of color.
Deep green, smoky blue, burgundy and warm terracotta can transform a modest recess into a jewel-box feature. Pair the saturated backdrop with a contrasting basin so the composition retains definition.
The finishes still need to withstand moisture. Use washable wall paint away from direct water and install tile, glass or another durable surface within the main splash zone.
Designer Tip: Repeat the nook color in only two or three living-room accents, such as a cushion, vase or artwork.
Budget Hack: Paint an existing vanity and wall in the same color, then protect the basin area with a modest tiled upstand.
Luxury Upgrade: Match the cabinetry lacquer, grout and wall finish for a seamless result.
16. Use a Sculptural Pedestal Basin

A decorative pedestal basin can stand alone without a conventional vanity. Ribbed ceramic, terrazzo, fluted stone or molded solid surface gives the fixture the visual presence of a sculpture.
This approach is best when storage is available elsewhere. Because the basin remains exposed, the wall connections, faucet and waste arrangements must be exceptionally neat.
Install a recessed niche or narrow ledge for soap. Anchor the pedestal visually with a mirror, pendant or defined wall treatment so it does not appear to be floating randomly in the room.
Common Mistake: Choosing a pedestal solely for its sculptural form without checking bowl depth, stability and faucet reach.
Budget Hack: Use a standard pedestal basin against a painted arch or tiled panel.
Luxury Upgrade: Commission a monolithic pedestal in carved stone or pigmented concrete.
17. Integrate the Basin with a Bar Cabinet

Combining the basin with a bar, coffee station or entertaining cabinet allows several social functions to share one millwork wall. When the doors, finishes and lighting remain consistent, the basin becomes part of a sophisticated hospitality zone.
Keep the handwashing area distinct from drink preparation. Assign separate drawers to towels and glassware, and provide enough counter space that soap cannot migrate into the beverage zone.
A retractable door can conceal the basin between gatherings, but the cabinet should remain open until wet surfaces have dried. The counter, interior panels and hardware must all tolerate occasional splashing.
Styling Secret: Repeat one finish—such as bronze, dark walnut or reeded glass—across both zones while keeping their storage separate.
Budget Hack: Place a compact vanity beside a freestanding drinks cabinet and unite them with matching paint and handles.
Luxury Upgrade: Add pocket doors, integrated lighting, custom organizers and a continuous stone backsplash.
Planning and Installation Checklist
Before selecting your favorite from these 17 Wash Basin Ideas in Living Room That Look Built-In, check how the proposed design will perform when it is wet, busy and being used by guests—not only when it is perfectly styled.
Basin and faucet
- Confirm the finished rim height.
- Lower the counter when using a tall vessel basin.
- Choose a bowl deep enough to contain splashes.
- Ensure the faucet reaches sufficiently far into the basin.
- Avoid an unnecessarily high spout over a shallow bowl.
- Test water pressure and the point where the stream hits.
Cabinetry and storage
- Use moisture-resistant materials and properly sealed edges.
- Plan drawers around the trap and water lines.
- Include storage for clean towels and soap refills.
- Provide a discreet place for used towels.
- Keep valves and the waste trap accessible.
- Avoid permanently sealing plumbing behind fixed panels.
Walls and floors
- Protect the wall with a suitable backsplash.
- Seal countertop joints and pipe penetrations.
- Use washable materials around the basin.
- Choose flooring that tolerates occasional drips.
- Avoid positioning the basin beside delicate upholstery.
Lighting and electrical work
- Combine ambient light with clear task lighting.
- Choose a flattering warm color temperature.
- Position sconces so they do not create severe facial shadows.
- Follow local electrical safety requirements around water.
Circulation
- Leave adequate standing room in front of the basin.
- Make sure drawers do not strike nearby furniture.
- Test entrance and cabinet doors.
- Avoid sharp counter corners in narrow passages.
- Confirm that dining chairs can be used without blocking access.
Frequently Asked Questions
1. Is it a good idea to install a wash basin in the living room?
Yes, particularly in open living–dining rooms, entrance foyers and homes that frequently host guests. It allows convenient handwashing while keeping private bathrooms separate. The design must include splash protection, hidden storage and visually coordinated finishes.
2. Where should a living-room basin be placed?
The best location is usually near the entrance, dining area or a transitional passage. Whenever possible, position it near existing kitchen, bathroom or utility plumbing to reduce installation complexity.
3. How can I make the wash basin blend with my living room?
Treat it like a piece of furniture. Repeat the living room’s timber, stone, color or metal finishes; conceal plumbing and supplies; add warm lighting; and avoid displaying bathroom-specific accessories.
4. Which basin style works best in a small living room?
A compact wall-mounted, corner or semi-recessed basin is often suitable. A shallow floating vanity also provides storage while allowing the flooring to remain visible underneath.
5. Which living-room basin design looks the most built-in?
Floating furniture-style vanities, arched alcoves and integrated stone basins usually appear most architectural. The 17 Wash Basin Ideas in Living Room That Look Built-In show that alignment, material continuity and concealed plumbing matter more than the basin’s price.
6. How can plumbing be hidden?
Pipes can be concealed inside moisture-resistant cabinetry, a service wall or a removable decorative panel. The valves and waste trap must remain accessible for repairs.
7. Which basin shape produces the least splashing?
A sufficiently deep basin with gently sloping sides generally controls water better than a flat, shallow bowl. Faucet height, reach, water pressure and landing position are equally important.
8. Does a living-room basin need a backsplash?
A backsplash is strongly recommended. It protects the wall and makes cleaning easier. Tile, porcelain, quartz, sealed stone, glass and solid surface are common choices.
9. Can wood be used for the vanity?
Yes, provided the cabinet is constructed and finished for a wet area. Use moisture-resistant substrates, sealed veneer or appropriately protected timber, and wipe away standing water promptly.
10. What is the best countertop material?
Quartz, porcelain and solid surface offer a useful balance of water resistance, durability and easy maintenance. Natural stone creates a luxurious result but may need sealing and specialist cleaning.
11. Should the basin have a mirror?
A mirror is helpful for guests and makes a small niche appear brighter. Choose a decorative shape and frame that complement the living room instead of relying on a conventional bathroom mirror cabinet.
12. How can I keep the basin area uncluttered?
Store refills and cleaning supplies in drawers. Display only a soap dispenser and a neatly folded or hanging towel. Add a concealed basket or drawer for used towels.
13. Can a basin be installed far from existing plumbing?
It may be possible, but longer supply and drainage routes can increase construction costs. A qualified plumber must determine whether adequate drainage slope, venting and code compliance are achievable.
14. What lighting should be used above the basin?
Combine warm ambient light with practical task lighting. A pair of small sconces, one well-placed wall light or a softly illuminated mirror will feel more residential than a harsh overhead spotlight.
15. How can I make a basic basin look luxurious?
Use a restrained material palette, concealed storage, accurately aligned fixtures and layered lighting. A standard white ceramic basin can look expensive when placed on a well-proportioned vanity against a carefully finished wall.
Conclusion
Picture the corner after the work is complete: the basin sits beneath soft light, the pipes have disappeared, the counter holds one beautiful soap dispenser and the vanity repeats the timber or stone already shaping the room. Guests immediately understand where to wash their hands, yet the area never interrupts the atmosphere of the living space.
Use these 17 Wash Basin Ideas in Living Room That Look Built-In as starting points rather than rigid templates. Study your available wall, confirm the plumbing and choose the one design that genuinely supports how your household moves, entertains and lives.
When the practical details are resolved with care, even an affordable ceramic basin can feel custom. It becomes more than a convenient fixture—it becomes a small daily ritual framed by a room you are proud to share.


